Update 7/10/2015:
All instructions and mentions of Gadwin Print Screen in this article refer to version 4.7 of this program, by now (July 2015) an "old" version. I still install this old version 4.7 on my customer's computers because it is easier to handle than the new version(s). Newer versions have more functionality and behave differently. These instructions are invalid for newer versions.
I admit it, I do read manuals; well, "read" maybe is too strong indeed but at least I glance them over as to get a good idea what the underlying gadget is about. Often I find an overview chapter or the like and THAT I usually really read.
Why am I telling this here? Because it puzzles me to see that computer users of many years all too often don't even know about such a basic thing as how to take a screen shot which is a total or partial image of what you see on the computer's monitor.
There is an actually fairly complicated MS Windows method but it falls quite a bit short of being comfortable and easy to remember.
There are quite a few decent free programs out there to help avoid the quirky Windows method. Some years ago I favored a small program called MWSnap. By now it has been superseded by Gadwin Print Screen.
If I set up your computer fairly recently you should already have this program running and set up as described below. Check your system tray for this little icon:
Rest your mouse cursor on this icon and it will tell you “To capture Image …”. From a right click on this little icon you can directly select Help and the Help system for this program will come up where you find all other information about it.Once installed Gadwin Print Screen sits quietly in the background and waits for you to push the PrintScreen key on your keyboard. Depending on easy to accomplish settings in the program it will do what you told it to. It either captures the
- Current Window
- Client Window
- Full Screen or a
- Rectangular area.
The output file format should be set to PNG; this is my favorite format for this purpose because files are relatively small, decent to good quality and any image processor can handle PNG. Output files get by default consecutively numbered and stored in My Documents\PrintScreenFiles.
The program is easy to use, unobtrusive, has good documentation and it's FREE. Beat that combination. It works on XP, Vista, Windows 7 and Windows 10. You find it’s Help after you double click (open) the little tray icon; in the program window click Help and voila, there you are.
Updated Jan 20th 2017:
You once could download it from here but the version I am talking about is no longer available for downloading on the manufacturer's web site, likely since quite a while already. See below after Download,
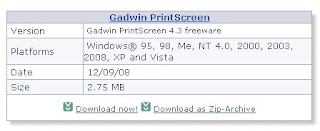
Ignore the immediately following! Please scroll down until you find the entry for the free version; it looks like this:
 As usual what you download is an installer program; run the installer and GadwinPrintScreen will be installed. Once it runs okay please don't forget to delete the installer.
Download: (added 12/7/2017): I found a (today!) working download link for the old version 4.7. This will download a ZIP file (a compressed archive). Let it open and copy the Setup file to your desktop. Close the ZIP file display. Run the setup program and then set the program up like described below. Good luck and NO GUARANTEES.
Start the program by double clicking the new "Gadwin Print Screen" icon and set
- Preferences to Preview the captured image,
no notification messages,
no splash (screen) on startup and
Run at Windows startup - Source to Rectangular Area
- Image to Image file type PNG
After these settings I delete the program icon and the downloaded installer program from the desktop and/or the Downloads folder respectively..
As usual I welcome comments and suggestions right here in the blog. Thank you in advance.
Stay safe!


No comments:
Post a Comment